Your First Flight After Maintenance Is a Test Flight
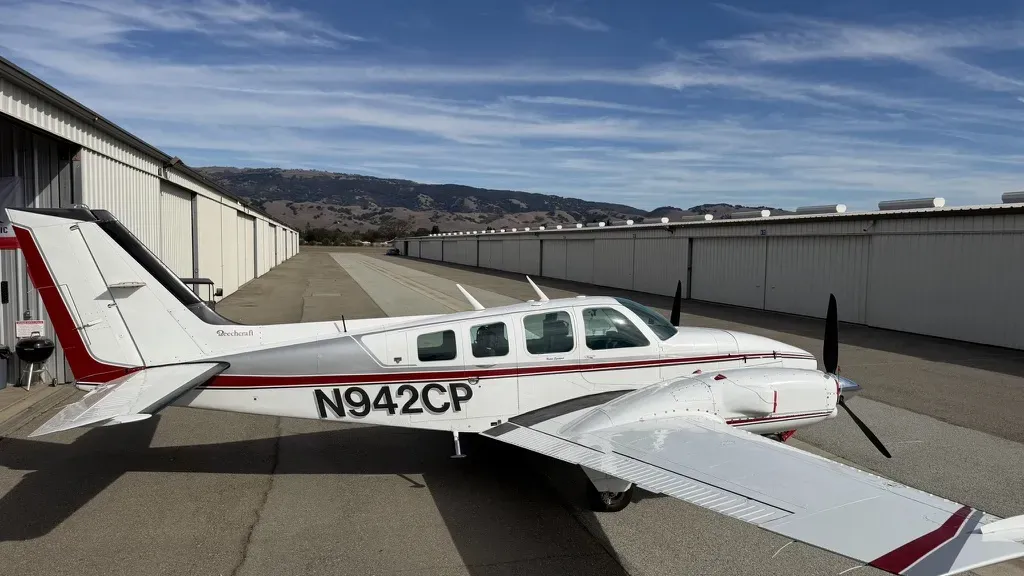
The airplane you pick up from the shop is not the airplane you dropped off.
During an annual inspection, a mechanic opens nearly every inspection panel, pulls the cowlings, removes the seats, floorboards, and interior panels, pulls the spark plugs, opens the fuel strainers and the oil filter, and often disconnects flight controls, trim, and gear doors. Then someone has to put all of it back together correctly. Every fastener, cotter pin, safety wire, hose clamp, and B-nut that was disturbed is a chance for something to be missed.
Most of the time, everything goes back correctly. But when something is missed, the first flight is usually when you find out. On that flight, you are the last check between a maintenance error and the people aboard.
In Price Tells You Nothing, I wrote that I’ve found problems at pickup after every kind of annual, from the inexpensive ones to the expensive ones: squawks left unaddressed, windows safety-wired shut, leaks, and loose fuel injectors. This article is about how to find those problems on the ramp instead of in the air. It ends with a return-to-service checklist you can adapt for your own airplane. I built the original for my Baron, drawing on American Bonanza Society guidance and the Beechcraft inspection procedures. The version here is generic so it applies to most piston singles and twins.
What the data says
Pilots have long said that the most dangerous flight of the year is the one right after the annual. That saying now has some data behind it.
In a 2025 study, Daniele Paolo Scarpazza and Joseph Hutter analyzed NTSB records of Part 91 airplane accidents and serious incidents from 2008 through November 2024. They compared events caused by the aircraft itself with events caused by pilots, and looked at how many hours had passed since the last inspection. They found the hazard of an aircraft-caused event was about 33.8% higher than baseline in the first hour after an inspection. The excess risk tapered off and returned to baseline around 31 hours (Scarpazza and Hutter).
Records analyzed: NTSB Part 91 airplane accidents and serious incidents, 2008 to November 2024
Risk in the first hour after an inspection: About 33.8% higher than baseline for aircraft-caused events
When the extra risk fades: Around 31 hours after the inspection
That finding deserves some care. It’s a relative increase in a rare event, so the first flight after an annual is not likely to end in an accident. The paper is a preprint that hasn’t been peer reviewed, and only about a third of NTSB records include the time since inspection. Still, it matches older work. An FAA review of ten years of NTSB data found that reversed installations and wrong parts were the installation errors most likely to cause death or injury in GA accidents (Goldman, Fiedler, and King, 2002). A study of helicopter accidents found maintenance-related accidents clustered soon after the work, with 31% in the first 10 flight hours (source).
The practical point is that the risk is highest right when the airplane comes back, and most of it is under your control. A careful inspection and a short, deliberate test flight are how you catch errors before they catch you.
What it looks like in NTSB reports
Read NTSB reports for a while and the phrase “first flight after the annual inspection” keeps showing up. Most of the errors are small. A pilot could have found nearly all of them on the ground.
| Aircraft | What was missed | Outcome | Source |
|---|---|---|---|
| Beech A45 | Fuel metering unit outlet B-nut found less than finger-tight, 2.2 hours after an annual that inspected the fuel lines | Engine power loss; pilot killed | General Aviation News |
| Piper PA-22 | Elevator cables replaced during the annual and installed backward | Crashed on takeoff; two seriously injured | NTSB SA-041 |
| Piper PA-12 | Elevator cables installed incorrectly, moving opposite to pilot input | Pitched up and crashed on takeoff; pilot killed | NTSB SA-041 |
| Cessna T182T | Elevator trim cables rigged backward after trim work | Extreme nose-down forces after takeoff; pilot landed safely | NTSB SA-041 |
| Schweizer 2-33A glider | Rudder removed and reinstalled with cables rigged incorrectly | Crashed; pilot seriously injured | NTSB SA-041 |
Professional operations aren’t immune either. In 2003, Air Midwest Flight 5481, a Beech 1900D, crashed on takeoff at Charlotte, killing all 21 aboard. The NTSB found the elevator had been incorrectly rigged during maintenance two days earlier, which limited its nose-down travel. An aft center of gravity made it worse (NTSB).
The NTSB responded to this pattern with a safety alert titled “Pilots: Perform Advanced Preflight After Maintenance.” In these cases, it says, the mechanics did not notice controls moving the wrong way, and the pilots did not catch it on preflight (NTSB SA-041).
The mechanic’s signature isn’t the end of it
None of this is an argument against mechanics. Most are careful professionals, and the good ones want you to double-check their work. But they are people, subject to the same interruptions, fatigue, and end-of-day pressure that affect pilots. Even the best shop sometimes misses something.
The regulations also put the final responsibility on you. Under 14 CFR §91.403(a), the owner or operator is primarily responsible for keeping the aircraft airworthy, and the pilot in command decides whether it’s safe to fly. When maintenance may have changed how the airplane flies or affected its operation in flight, §91.407(b) says no one may carry passengers until a pilot has flown it, made an operational check, and logged the flight.
Few shops test-fly airplanes anymore, and some don’t even run the engines after the work. In practice, that makes you the test pilot. The American Bonanza Society’s Thomas Turner has written about finding gear handcranks trapped behind spar covers, ailerons missing screws, gear doors swapped side to side, and autopilot disconnects that were never hooked up. All of these were found by owners accepting their airplanes from reputable shops.
How to use the checklist
The checklist runs in phases, and the airplane must pass each one before you move to the next: paperwork, ground inspection, ground run, test flight, and post-flight inspection. Everything on it can be done with a flashlight, an inspection mirror, a couple of screwdrivers, and some rags. It finds what a pilot can see, feel, or operate. It cannot verify torque, cable tension, or rigging tolerances, so it supplements the mechanic’s sign-off rather than replacing it.
Three ground rules run through all of it:
- Put your phone in airplane mode and inspect without distractions.
- Finish one area, then confirm it against the list before moving on. Restart that area if you’re interrupted.
- Treat any abnormality as a stop: shut down, taxi back, or land, and get it explained.
Plan on half a day, and don’t plan to fly anywhere else that day.
Make it yours
A generic list is a starting point. The version I use for my Baron is several times longer, because a twin with turbochargers, retractable gear, and ice protection has far more that can go back together wrong. Here’s how to build your own:
- Start from your POH preflight. Add a post-maintenance item to every step of the walkaround.
- Walk the annual inspection checklist. Your airplane’s maintenance manual lists everything a mechanic inspects. Anything they inspect, they may remove or disconnect, and that’s what you need to double-check.
- Add your type’s known traps. Type clubs and owner groups know what gets missed on your model. On Beech retractables, for example, the carry-through spar cover can be reinstalled over the emergency gear handcrank, leaving it impossible to use.
- Add your systems. Turbocharging, constant-speed props, ice protection, oxygen, autopilot, air conditioning, and a second engine each deserve their own items, on the ground and in flight.
- Add a section for each kind of work. Engine work calls for break-in instructions and extra leak checks. Paint calls for rebalanced control surfaces and clear static ports. Avionics work calls for a pitot-static check and autopilot disconnect tests. Interior work calls for a look at the control cables under the floor.
- Write down your numbers. Record normal static RPM, fuel flow, oil pressure, and temperatures before the airplane goes in, so you have a baseline to compare against.
- Learn which way everything moves. The NTSB specifically recommends knowing the normal direction of every control and trim surface before maintenance, so a reversal stands out (NTSB SA-041).
- Keep a squawk log and clear every line with the shop before you accept the airplane.
- Revise it every time. When you find something new, add it. Date and version your list so you know which one you used.
Fly it like a test pilot
Picking up an airplane from the shop isn’t just a matter of paying the bill and flying home. Do the paperwork, inspect the airplane as if an examiner were watching, run the engine and look again, fly a short test hop near the airport, and inspect it once more. If something doesn’t look right, it isn’t right until someone explains it.
Most of the time you’ll find nothing, and that’s fine. It’s still a successful test flight. The one time you find a loose B-nut or a reversed trim cable on the ground, the checklist will have earned its keep many times over.
The return-to-service checklist
1. Before pickup
- Before drop-off, removed personal items and photographed the panel, interior, and any existing dings
- Wrote down the squawk list and agreed on scope and price
- Asked the shop for a list of everything removed or disconnected, and whether they ground-ran the engine and swung the gear
- Current and proficient in type, or bringing an instructor
- Rest of the day kept free, with a backup way home
- Day VFR, light winds, and a low crosswind
- Longest runway and a full-length takeoff planned
- No passengers on the first flight
2. Paperwork and shop debrief
Don’t start the engine until the return-to-service entries are signed. A logbook sticker promised later is not a return to service.
- Airworthiness certificate, registration with your correct address, operating limitations, and current weight and balance aboard
- POH supplements for any new equipment; placards and instrument markings in place
- Logbook entries for every item of work, signed, with the return-to-service statement
- AD list updated; yellow tags, 337s, and STC paperwork in hand
- Walked through the work with the mechanic: what was removed, what to watch, any target values that differ from the POH
3. Cabin and cockpit
- No tools, rags, or hardware on the floor, under seats, or in baggage areas
- Seats on the correct rails with stops engaged; belts and harnesses attached
- Doors and emergency exits latch properly; required safety wire intact
- Control lock removed
- Flight controls: full, free travel, and moving in the correct direction (a helper watches outside)
- Engine controls: full travel, no binding
- Trim: free through full travel, then set to neutral for the exterior check
- Fuel selector moves to every position with positive detents
- Circuit breakers in; instruments and panel secure
- Your own gear back where you left it
4. Exterior walkaround
- Every inspection panel present, with all screws in and every bolt secured by a nut and retaining device
- Belly and tail cone patted, listening for tools inside
- No hangar rash on tips and control surfaces
- Ailerons, flaps, elevator, and rudder: hinges and hardware secure, no missing screws, correct direction of travel
- Trim tabs flush with their surfaces when the cockpit indicator reads neutral, and moving the correct way
- Fuel caps sealed; every drain sumped, no water or debris
- Static ports and pitot clear; antennas and lights secure
- Any fresh oil, fuel, or hydraulic stain wiped clean, to recheck after the run-up
5. Landing gear
- Tire condition and inflation; axle nut cotter pins installed
- Brakes: hardware secure, no fluid at fittings, discs undamaged
- Struts extended within limits and dry
- Retractables: gear doors on the correct side and attached, linkages cotter-pinned, squat switch connected, nothing loose in the wheel wells, emergency extension handle stowed and reachable
6. Engine compartment
- No tools, rags, or safety-wire clippings on the engine or baffles
- Oil level correct, dipstick and cap secure, oil filter safety-wired
- Oil and fuel lines tight and dry; no blue fuel stains
- Exhaust secure with all clamps and nuts, no exhaust staining
- Induction and air filter secure
- Spark plug leads attached; magnetos secure
- Throttle, mixture, and prop linkages secured with cotter pins, with full travel
- Baffles and seals in place; alternator belt present
- Propeller and spinner secure, no oil from the hub
- Every cowl fastener closed
7. Short ground run and leak check
If anything ahead of the firewall was touched, start the engine, run it for two or three minutes, shut down, and look again.
- Oil pressure rises within limits, or shut down at once
- Engine, electrical, and vacuum indications normal
- After shutdown, uncowled and checked for leaks by sight and smell; no drips under the airplane
8. Taxi and run-up
Run the full POH before-takeoff checklist, plus:
- Brakes even, steering straight
- Controls free and correct one more time, with the engine running
- Flaps through every position
- Mag check, prop exercise, and electrical charging normal
- Autopilot and electric trim tests, including disconnects
- Abort criteria briefed out loud
9. Test flight
Plan about 30 minutes in the air, close to the airport and high enough to glide back.
- Engine instruments normal on the takeoff roll; full-power numbers match the POH
- Gear and flaps cycle normally
- Hands-off, the airplane holds wings level with the ball centered and trim near neutral
- Engine smooth at cruise; mags checked in flight
- Avionics, autopilot, and electrical system all work
- Stall warning sounds as you approach a stall
- Twins: feather test of each engine at a safe altitude near the airport; the prop feathers in a reasonable amount of time and unfeathers normally on restart
- Land at the first sign of anything abnormal
10. Post-flight inspection
- Uncowled again and repeated the leak check; leaks often show only at full temperature
- Belly and wheel wells checked for new streaks or stains
- Oil level rechecked
- Every squawk reviewed with the mechanic, with the exact readings you saw
- Anything more than minor fixed, and flown again
- Operational check flight logged if §91.407(b) applies; copies of all entries taken home
Sources and further reading
- Scarpazza and Hutter, “Quantifying the Risk of Accidents and Serious Incidents Due to Maintenance in General Aviation” (preprint, 2025)
- NTSB Safety Alert SA-041, “Pilots: Perform Advanced Preflight After Maintenance”
- NTSB, Air Midwest Flight 5481 investigation
- Goldman, Fiedler, and King, “General Aviation Maintenance-Related Accidents: A Review of Ten Years of NTSB Data” (FAA, 2002)
- “Maintenance and inspection as risk factors in helicopter accidents”
- General Aviation News, “Maintenance error leads to fatal accident”
- Thomas P. Turner, “After-Maintenance Inspection,” parts 1 and 2; “Post-Maintenance Acceptance Flight”; and “Return to Service” (American Bonanza Society)
- FAA, “Advanced Preflight” pamphlet (FAA-M-001), recommended in NTSB SA-041
David Stites, MEI
Multi-engine flight instructor and professional ferry pilot in the San Francisco Bay Area.
Ready to Start Your Multi-Engine Training?
Contact me today to discuss your training goals and schedule your first lesson.
Get in Touch